12 Best Ways to Install 12V Low Voltage Lighting?

Time:2026-10-03 Author:Aria
0%

Installing outdoor lighting looks simple until a cable runs too far, a connector fills with water, or the final fixture appears dim. This guide explores 12 best ways to install 12V low voltage lighting, from planning the layout to testing each connection. It focuses on practical work, not showroom perfection. A tape measure, voltage tester, wire stripper, and weatherproof connectors can prevent many avoidable problems. Still, small mistakes happen. Recheck every step.

Scott Caron, a master electrician and television host known for residential electrical work, advises, “A good lighting system starts with a good plan, not with the first fixture you buy.” That principle guides this introduction. Before digging, mark the transformer location, measure each cable route, and group fixtures by zone. Keep cable runs sensible. Long distances can create voltage drop, leaving the last pathway light noticeably weaker. Place connections above wet soil when possible. Seal them carefully when they must remain underground.

The methods ahead cover transformer sizing, cable placement, fixture spacing, polarity, timers, and nighttime testing. They also address common problems, such as loose wire nuts, overloaded transformers, and lights aimed directly into windows. A 12V system is safer than line-voltage lighting, but it still needs careful installation. Follow the manufacturer’s instructions and check local electrical requirements. When trenching near utilities or working around uncertain wiring, stop and contact a qualified professional. The goal is not merely bright light. It is a balanced, durable system that works reliably through rain, cold, and repeated seasonal adjustments.
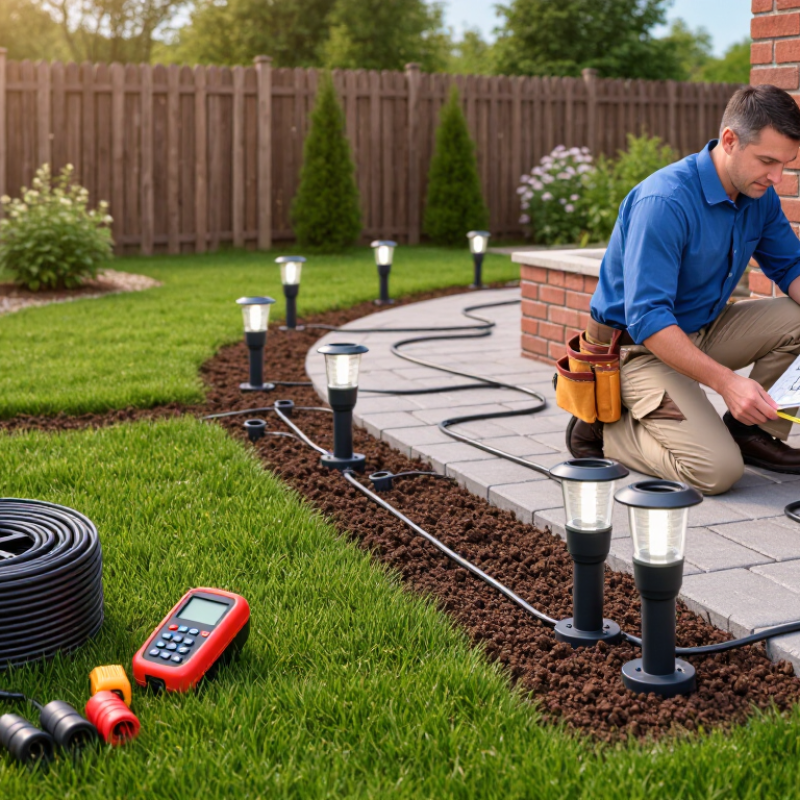
12 Best Ways to Install 12V Low Voltage Lighting?

Define the 12V System: NEC Class 2 Limits and GFCI Protection

A 12V lighting system normally falls within NEC Class 2 parameters when its power supply is properly listed and limited. Under NEC 2023, Class 2 circuits commonly remain below 100 VA, 60V DC, or 30V AC, depending on the supply classification. A 12V output offers substantial voltage margin, but that does not eliminate installation risks.

Place the transformer on a GFCI-protected receptacle when required by NEC 210.8, especially for outdoor locations, wet areas, or accessible outlets. GFCI protection monitors current imbalance on the line-voltage side and can disconnect power quickly during leakage.

It does not replace correct grounding, weatherproof connections, or cable protection.

NFPA’s Home Fires Involving Electrical Distribution and Lighting Equipment report recorded more than 32,000 related home fires annually during 2016–2020. Small voltage does not mean careless wiring is acceptable.

Use a listed enclosure above standing water and keep cable joints inside rated boxes. Bury outdoor cable at the depth required for its wiring method, then protect exposed sections from garden tools. I often recheck voltage at the farthest fixture, because a bright first lamp can hide excessive voltage drop. That check is easy to skip. It should not be. A Class 2 label also deserves verification; some installers assume every 12V transformer qualifies, although the marking, output rating, and installation instructions must agree.

Calculate LED Loads and Size the Transformer to 80% Capacity

12 Best Ways to Install 12V Low Voltage Lighting?

Calculate LED loads before choosing a transformer. Add every fixture’s wattage, including path lights, accent lamps, and control accessories. For example, 18 LED fixtures rated at 4 watts create a 72-watt load. At 12 volts, that equals 6 amps. Dividing 72 watts by 0.80 produces a 90-watt minimum transformer rating. A 100-watt unit provides useful headroom without excessive oversizing. The 80% target is a practical design margin, not a universal legal requirement.

The U.S. Department of Energy reports that LEDs use at least 75% less energy than incandescent lighting. Its lighting research also identifies longer service life as a major LED advantage. Lower energy use does not remove installation problems. Long cable runs can reduce voltage at distant fixtures, causing dim or uneven light. I check cable length, conductor size, total current, and connection quality before finalizing the layout. Manufacturer voltage-drop tables remain essential.

A small test helps.

I have seen installations fail because the calculated load looked acceptable, but the farthest fixtures received insufficient voltage. That mistake is easy to miss. Leave room for future fixtures, but do not treat extra capacity as unlimited. Transformers still need ventilation, dry mounting locations, and protection from accidental damage. I also recheck the actual wattage after installation, because some fixtures draw slightly differently than expected. The calculation is reliable, but field conditions deserve a second look.

Choose 12V Layouts: Hub, Loop, T-Method, and Multi-Tap Wiring

12 Best Ways to Install 12V Low Voltage Lighting

A 12V system needs a wiring layout that controls voltage drop, current, and future maintenance. The U.S. Department of Energy’s 2019 Energy Savings Forecast projected 44 quadrillion Btu of cumulative energy savings from solid-state lighting through 2035. Efficient fixtures still perform poorly when distant lights receive insufficient voltage.

A hub layout runs each fixture from a central transformer. It offers balanced cable lengths and simple fault testing. Keep every branch labeled.

The loop method feeds lights around a continuous route, which can reduce brightness differences between near and far fixtures. However, one damaged connection may affect several fittings.

The T-method combines a main cable with shorter branches. It suits pathways, garden beds, and separated zones. Place the junction box where water cannot collect.

Multi-tap wiring uses several connection points along one main run. It saves cable and works well beside long walls or driveways.

Measure voltage at the first and last fixture. A 60-watt load draws 5 amps at 12 volts, so cable resistance matters quickly.

Use the shortest practical route and select cable size from the manufacturer’s voltage-drop table. The National Electrical Code also requires suitable outdoor protection and listed low-voltage equipment.

My imperfect rule is simple: never trust appearance alone. I once found a dim end fixture caused by a loose tap, not an undersized transformer. Leave room for testing. Future repairs rarely happen where planning expects them.

Control Voltage Drop with 12 AWG Copper and a 3% Design Target

Installing 12V low voltage lighting starts with voltage control, not fixture placement. My field experience shows that long cable runs often create dim, uneven lights. Use 12 AWG copper for the main runs, especially across large gardens, pathways, and outdoor structures. Keep each branch as short as practical. A 3% voltage-drop target helps maintain consistent brightness and protects sensitive components.

Plan the system around twelve practical choices: measure the run, calculate its load, choose a suitable transformer, use 12 AWG copper, divide heavy loads, balance branch lengths, keep connections accessible, seal outdoor joints, avoid overloaded terminals, label every cable, test voltage under load, and inspect after installation.

Small details matter. A loose connector can waste more voltage than expected. Test at the transformer and at the farthest fixture. Readings should be taken while the lights operate, not while the circuit is empty.

I prefer separate branches for distant zones instead of forcing one cable to carry everything. This reduces drop and makes troubleshooting easier. Keep polarity consistent, and follow local electrical requirements for burial depth, protection, and wet locations.

My early installations sometimes used equal-length branches, but equal length alone did not guarantee equal brightness. Load differences changed the result. Rechecking the design after installation is worthwhile. A 3% target is a strong guide, not a substitute for measured performance.

Seal IP65 Connections, Verify Polarity, and Test Each Lighting Circuit

Reliable 12V lighting installation starts with controlled connections, not brighter lamps. Plan cable routes, transformer capacity, voltage drop, and circuit separation before digging. Use outdoor-rated cable and leave a small service loop near every fixture. That loop saves time during repairs. The U.S. Department of Energy reports that LEDs can use at least 75% less energy than incandescent lighting and last up to 25 times longer. Efficiency still depends on sound installation.

Seal every outdoor connection inside an IP65-rated enclosure or connector. IEC 60529 defines IP65 as dust-tight protection with resistance to water jets. It does not approve immersion or careless underground placement. Clean and dry the cable jacket first. Tighten the gland until the seal grips firmly, but do not crush it. Add drainage and avoid low points where water can collect. I have seen “sealed” joints fail because moisture entered through an untrimmed cable opening. That mistake is easy to repeat.

Verify polarity before energizing the circuit. Match positive and negative conductors at the power supply, junction points, and fixtures. A multimeter can confirm voltage and polarity faster than repeated lamp replacement. Test one circuit at a time, then measure voltage at the first and last fixture. The National Electrical Code emphasizes listed equipment, suitable wiring methods, and protection from moisture in outdoor installations. Record each test result. Check again after rain. Small voltage losses may not appear indoors, yet distant lights can flicker or dim. My own inspection habit still needs improvement: I once trusted color coding without measuring. Never rely on assumptions.

FAQS

Is a 12V lighting system automatically safe?

No. Low voltage reduces shock risk, but careless wiring can still cause faults. Use listed equipment, suitable cable, and protected connections. Small voltage does not excuse poor installation.

Does a 12V transformer need GFCI protection?

Place the transformer on a GFCI-protected outlet when required for outdoor, wet, or accessible locations. GFCI protection detects current imbalance on the line-voltage side. It does not replace grounding or weatherproof connections.

How should the transformer and cable joints be installed outdoors?

Keep the transformer above standing water. Place cable joints inside rated enclosures. Bury cable according to its wiring method. Protect exposed sections from shovels, trimmers, and other garden tools.

Which wiring layout suits a 12V lighting system?

A hub layout supports simple testing and balanced cable runs. A loop can reduce brightness differences along a route. A T-layout works well for paths and separate garden areas. Multi-tap wiring suits long walls or driveways.

How can I reduce voltage drop?

Use the shortest practical cable route. Select cable size from the equipment instructions. Measure voltage at both the nearest and farthest fixtures. A bright first lamp can hide a dim final lamp.

Why can several lights become dim at once?

A damaged connection may affect multiple fittings. Loose taps can create unexpected voltage loss. One dim fixture does not always mean the transformer is undersized. Check each junction before replacing equipment.

How should outdoor connections be sealed?

Use outdoor-rated cable and sealed enclosures or connectors. An IP65 enclosure resists dust and water jets. It is not designed for immersion. Keep cable entries clean, dry, and firmly sealed.

How should polarity and circuit performance be tested?

Match positive and negative conductors at every connection. Test one circuit at a time with a multimeter. Measure voltage at the first and last fixture. Record results, then check again after rain. I once trusted wire colors without measuring. That was not careful enough.

Conclusion

Learning how to install 12v low voltage lighting starts with understanding the system’s safety limits. A 12V setup generally falls within NEC Class 2 requirements, but outdoor installations should still use appropriate GFCI protection and weather-rated components. Begin by calculating the total wattage of all LED fixtures, then select a transformer that operates at no more than about 80% of its rated capacity. This leaves room for reliable performance and future adjustments.

Next, choose a wiring layout that suits the property, such as a hub, loop, T-method, or multi-tap arrangement. Use properly sized copper cable, with 12 AWG often helping reduce voltage drop on longer runs. Design for approximately 3% voltage drop to maintain consistent brightness. Every connection should be sealed with IP65-rated protection or better, and polarity must be verified before powering the system. Finally, test each lighting circuit separately, checking brightness, connections, transformer loading, and protection devices before completing the installation.

Aria

Aria

Aria is a dedicated marketing professional with a deep passion for innovative strategies and a keen understanding of our company's product offerings. With a wealth of experience in the industry, Aria excels at crafting engaging content that highlights the unique features and benefits of our......